Recently, a client asked me develop a chrome extension that would interact with a JIRA issue page. I had never worked with JIRA before, so I had to figure out how to get a JIRA server up and running to test the chrome extension.
In this tutorial, I’m going to dump the steps I took to deploy a JIRA server using Docker. Specifically, my client needed the chrome extension to work with JIRA server version 7.14.3, so steps described in this tutorial will be deploying that version.
Disclaimer, I’m not a Docker expert, however, I do prefer using Docker when it comes to deploying a local server, and I use it a lot when I do node/express development. So my approach below may or may not be using best practices.
Note that there’s a docker image that would make setting up and deploying a JIRA server even easier than the steps I’m going to give in this tutorial. The reason I didn’t use this image is it doesn’t support the version of the JIRA server I needed, so I had to go down a more manual set of steps.
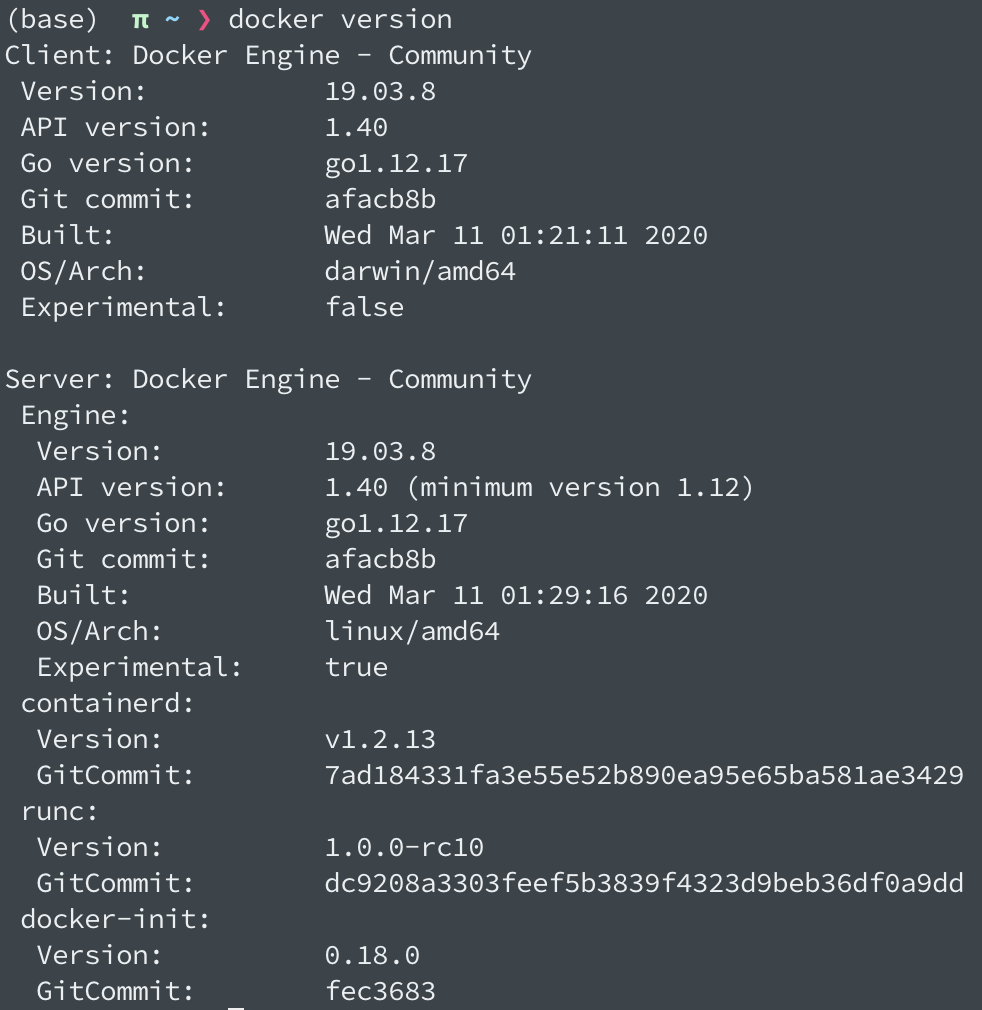
A good place to start might be to tell you what version of JIRA I used. Running docker version, I get the following output.
Next, I went to dockerhub and I pull the images I need to deploy. Reading the atlassian/jira-software dockerhub page, its clear I’ll also need a database. In this case, I’ll just use mysql (I already had an image on my machine, but I’ll post the steps for pulling that image as well).
docker pull atlassian/jira-software:7.13.4
docker pull mysql:5.6
With the images downloaded, I first setup the database.
Settings up MySQL Database
I created an instance of the MySQL database by running the following command
docker run --name jira_mysql -h jira_mysql -e MYSQL_ROOT_PASSWORD=root -d mysql:5.6
This command is pretty straight forward, however, just to be explicit, I gave the instance the name jira_mysql (same string for the hostname), with a root password of root (using the string ‘root’ is a terrible idea for production, however, since this is just to deploy a test server on my machine, I figured it was easy to remember. I use the same username password throughout the deployment :D).
With the database up and running, next I had to prepare a database table for JIRA. I came across this page which describes what needs to be done to prepare the database. Connect to running instance by running the following command
docker exec -it jira_mysql bash
Once connected, connected to the MySQL database by running the command, and entering ‘root’ as the password
mysql -uroot -proot
The link above says that you need to create a database as follows
CREATE DATABASE jiradb CHARACTER SET utf8 COLLATE utf8_bin;
That’s everything that needed to be done to set up the database. Next I’ll go over setting up the JIRA server.
Setting up the JIRA Server
Starting up an instance of the JIRA server was just as straight forward as setting up the database. I ran the following command to start up my JIRA server instance
docker volume create --name jiraVolume
docker run -v jiraVolume:/var/atlassian/application-data/jira --name="jira" -d -p 8190:8080 atlassian/jira-software:7.13.4
The steps were taken from the docker hub page. You could ignore the first command if you don’t want to create a volume mapping, however, I didn’t need it. Also, I mapped the instance port 8080 to 8190 on my local machine.
One important note from the above link states that the JIRA server doesn’t come package with a MySQL driver. I’ll leave it to that link to describe where to get the drivers:
Specifically, I downloaded version 5.1.48 of the driver. I downloaded it to my local machine and transferred it to the running instance. After unzipping the drivers, I transferred the jar file with the following command
docker cp mysql-connector-java-5.1.48.jar jira:/opt/atlassian/jira/lib
docker restart jira
After the instance restarts itself with the MySQL driver. I pointed my browser to http://localhost:8190. This opened up the following page:
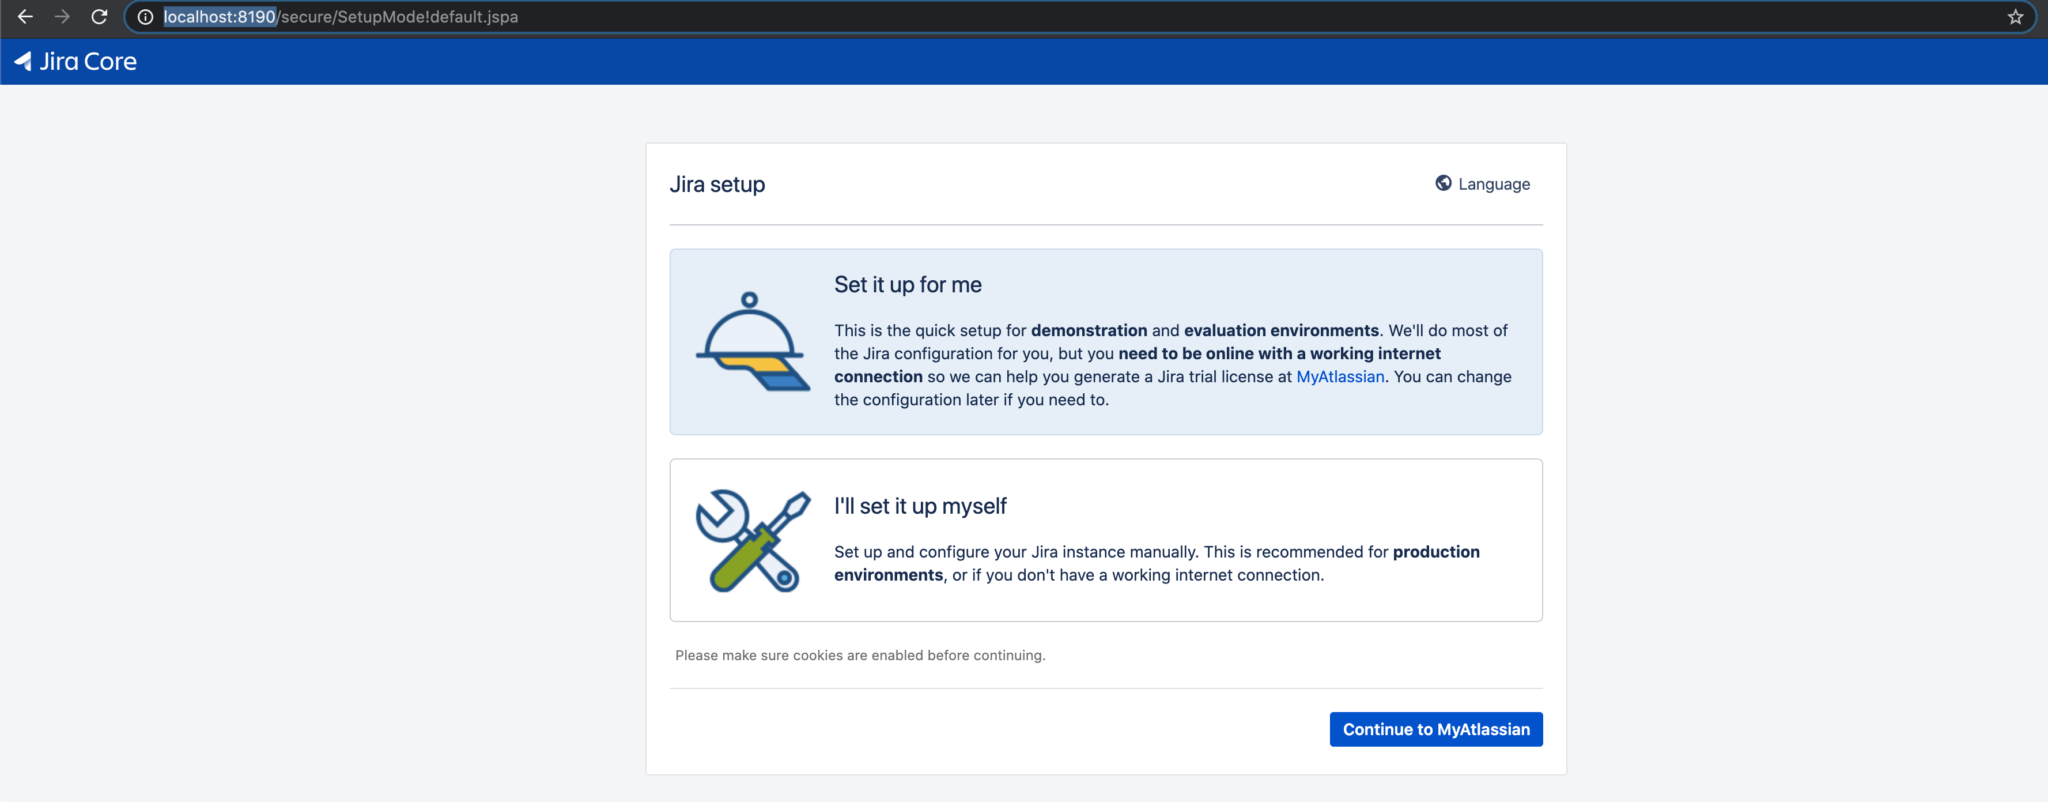
I chose the “I’ll set it up myself” option. Which then gave me the following screen
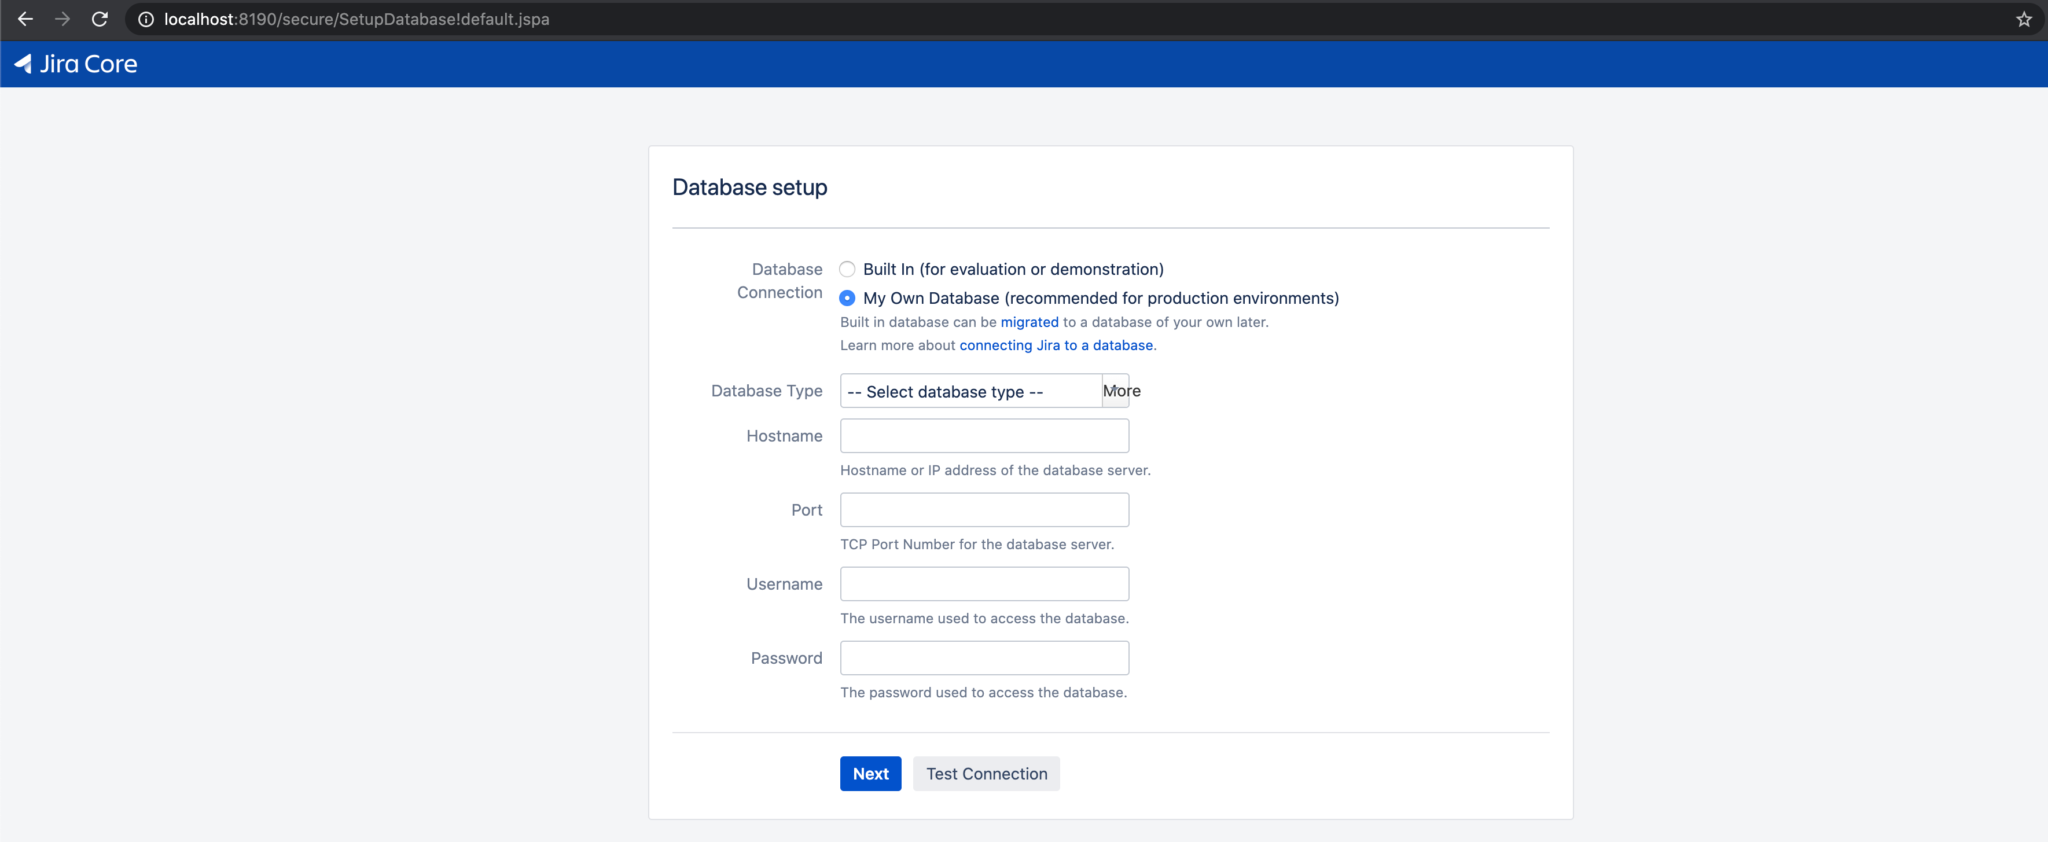
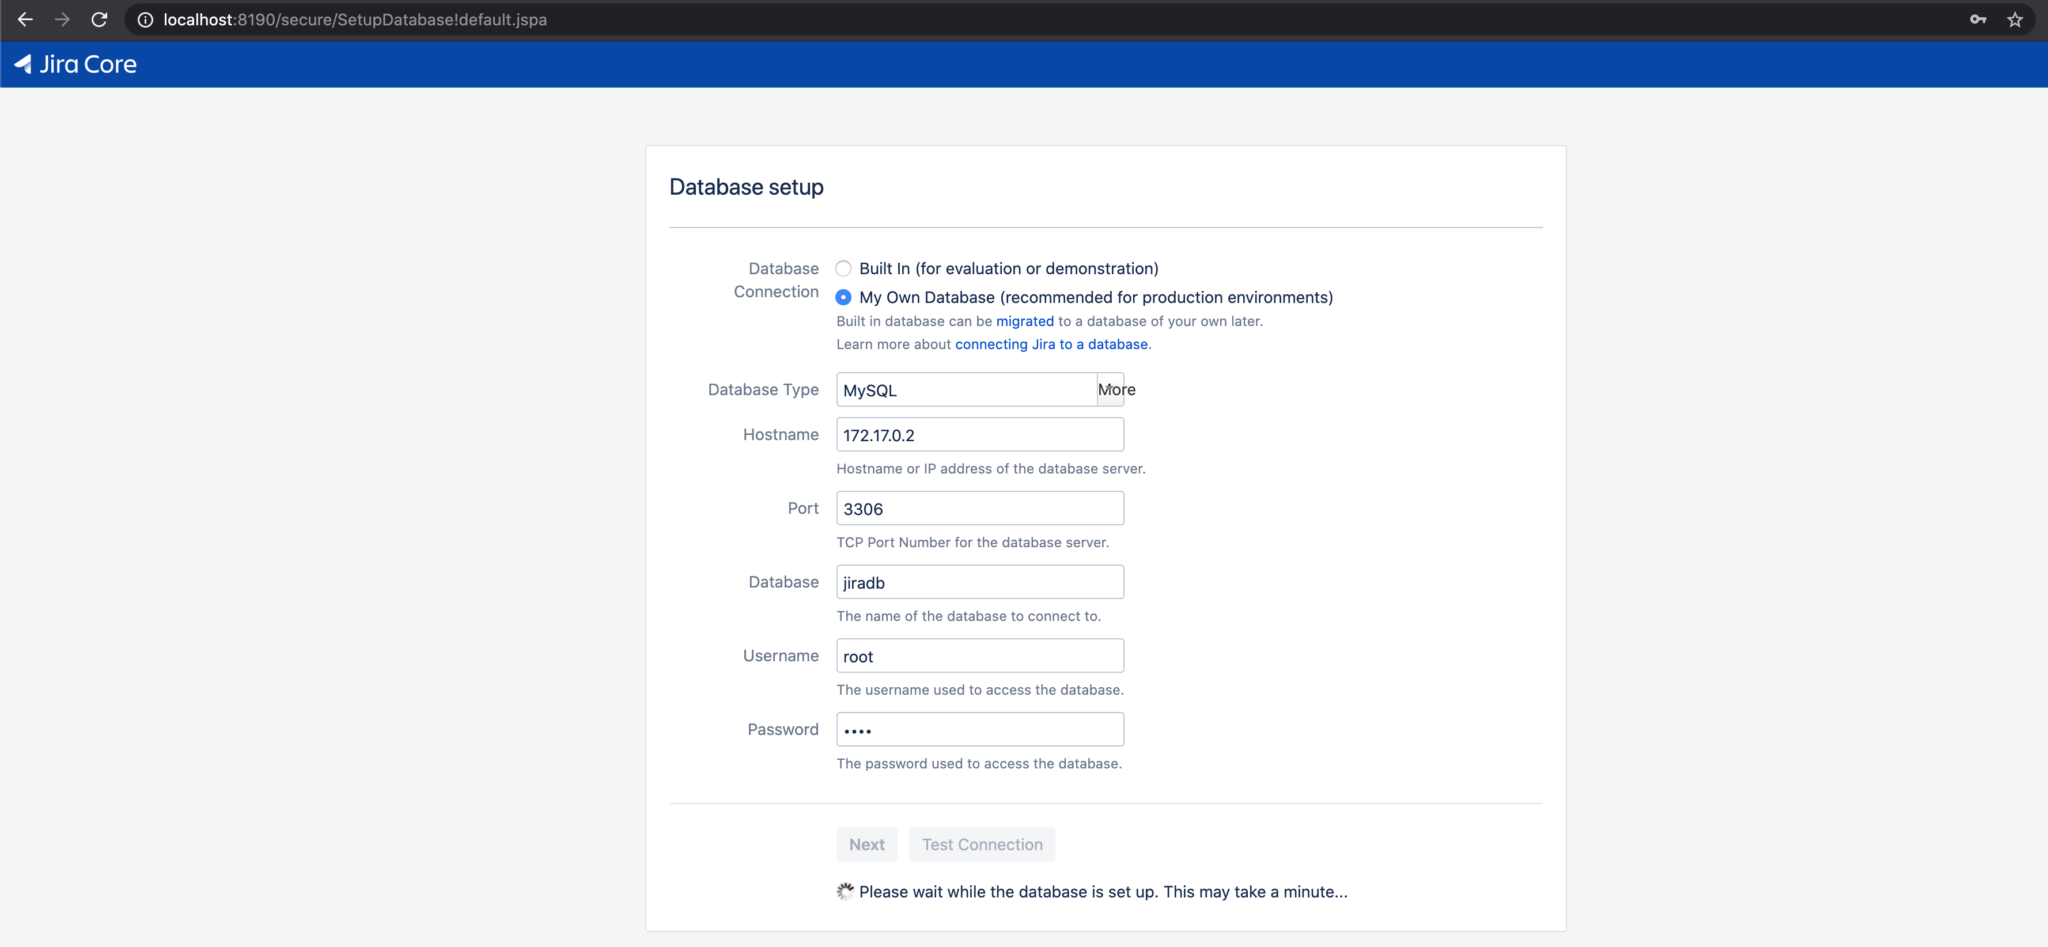
I first selected MySQL as my Database Type. Weirdly enough, when I entered “jira_mysql” as the hostname, the JIRA server wasn’t able to find it. So instead, at the command line, I searched for my database’s IP address with the following command.
docker network inspect bridge
This dumped a bunch of stuff on the screen, but the interesting section was in “Containers” which gave me the IP address
"Containers": {
  "7943654cc2c6c44c1e5656ade3f9d78a35ce6bd4211840b68b50f4f51fb82c25": {
    "Name": "jira_mysql",
    "EndpointID": "17c744f527782520e10dd931ca4b061b68caf7123be494fcdc7bd620c039727b",
    "MacAddress": "02:42:ac:11:00:02",
    "IPv4Address": "172.17.0.2/16",
    "IPv6Address": ""
  }
},
Using this value, I filled in the form to connect to the database, and then waited like 10 minutes for the initialization to complete
At this point, I just accepted all the default settings, and let it walk me through getting a license and initializing the server.
Takeaways
Hopefully you found something interesting in this tutorial.
Why would I post a tutorial on how to set up a very specific version of a JIRA server? Because it might be useful to someone else who might not find it as obvious as others.
However, I think the key takeaway here is how easy things have gotten with Docker when it comes to deploying application servers. I’m old enough to remember spending hours trying to get a local version of a web server and database to work.

The best book on machine learning for iOS.

Work with CoreML? Then you need MLFairy.com.

Enjoy my content? Consider becoming a member of my patreon, and help me continue making content!