When you talk about machine learning at the edge, you’re really talking about deploying TensorFlow models so that predictions occur client side.
Although TensorFlow JS allows you to run predictions from any NodeJS server, you can also use the library to run predictions in the browser. Moreover, when running in modern browsers, TensorFlow JS will leverage the device CPU to run predictions using WebGL. So your predictions run fast!
In this tutorial, you’ll see how to create an HTML page that will set up TensorFlow JS, train a very simple model, and run a prediction.
Note: This tutorial assumes you know the basics of working with TensorFlow, and specifically with the Keras API. It also assumes you know how to open a page in your browser and developer tools to read any console outputs. I’ll be using the Chrome browser in this tutorial.
To get started, create a file named index.html. Add the following to the file, which simply constitutes the boilerplate code for a webpage
<!DOCTYPE html>
<html lang="en">
<head>
  <meta charset="UTF-8">
  <meta name="viewport" content="width=device-width, initial-scale=1.0">
  <title>TensorFlow JS</title>
</head>
<body>

</body>
</html>
Anywhere between the head tag, add the follow line to pull in the latest version of TensorFlow JS
<script src="https://cdn.jsdelivr.net/npm/@tensorflow/tfjs@latest"></script>
Next you’ll want to open up a script section where you’ll add your javascript code. Directly underneath the above line you added, add the following tags to your file
<script>
  // JavaScript code will go here
</script>
You can reuse this same boilerplate code every time you work with TensorFlow JS in the browser. You can open the file in your browser, and bask in the glow of a blank page.
Great, with the boilerplate code out of the way, it’s time to create your model.
Defining the model
In this section, you’ll create your first TensorFlow JS model using JavaScript. The model itself will be very straight forward. You’ll create a model that should roughly fit a straight line. Specifically, the data you’ll use to train your model will roughly fit the linear equation
y = 2 * x - 1
You’ll start by defining the training data. To make this easy, you’ll hard code some values into a tensor using the TensorFlow JS API. Between the <script> tags you added earlier, add the following code
const xs = tf.tensor2d([-1.0, 0.0, 1.0, 2.0, 3.0, 4.0], [6, 1]);
const ys = tf.tensor2d([-3.0, -1.0, 2.0, 3.0, 5.0, 7.0], [6, 1]);
In Python, you may have created your tensors using NumPy arrays. Unfortunately, you don’t have NumPy when working with TensorFlow JS. Instead, TensorFlow provides an API for creating your tensors. In this case, the tensor2d method.
The first argument to tensor2d are all the values of your tensor, and the second argument is the shape of the tensor.
Next you’ll define your model. In this case, it’ll be a simple Sequential Model with a dense layer taking in one input and providing one output. Add the following lines to your code
const model = tf.sequential();
model.add(tf.layers.dense({ units: 1, inputShape: [1] }));
Note: If you’ve worked with TensorFlow in Python, this may look very familiar. But be mindful of the code here, especially the argument passed into dense. Although the code looks very similar, the syntax between the JavaScript and Python can be distinctly different. This means, if you’re used to creating your model in Python, pay close attention to the JavaScript specific syntax. In the above code, notice that the argument for the dense layer is a JavaScript dictionary. In Python you may be used to passing in these values directly.
In the above code, you can see that you’re creating a model which has an input shape of 1 (defined by inputShape), and an output shape of 1 (defined by the units of the layer).
Next you’ll need to define the loss function. In this case, you’ll use the mean-squared error, with Stochastic Gradient Descent (i.e. SGD). Add the following line to your code
model.compile({ loss:'meanSquaredError', optimizer:'sgd' });
model.summary();
Notice that the compile method takes in a JavaScript dictionary! Finally, you can also add a call to summary() to see what your model will look like. Refresh your page, and you should see the following in your console output.
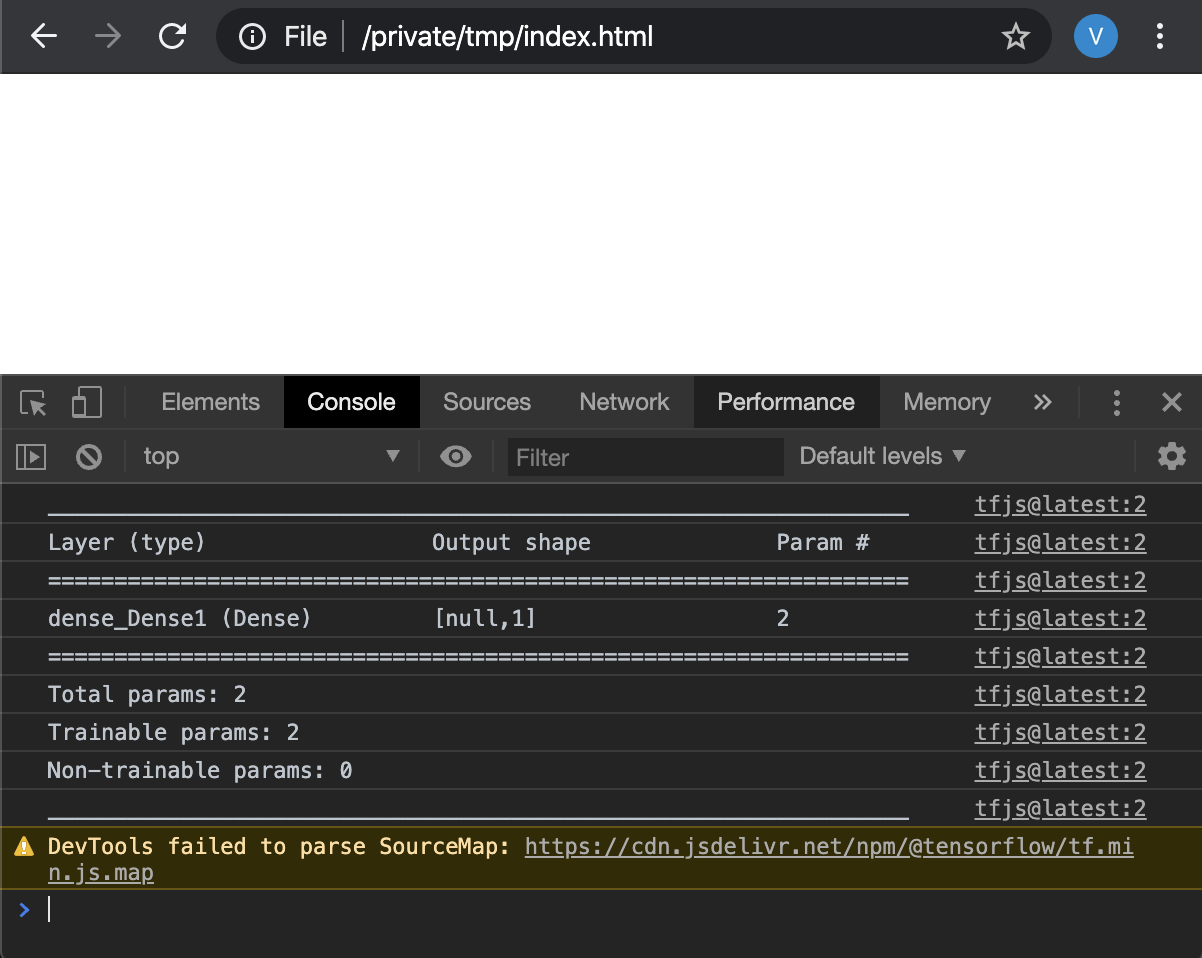
You might be wondering why there are two trainable parameters. In this case, its the weight and bias of the Dense layer.
Great! with the model defined, it’s time to train your model.
Training your model
You’ve setup your tensors, you’ve created your model’s architecture, now its time to train your model. Right after the summary(), add the following code
model.fit(xs, ys, {
  epochs: 500,
  callbacks: {
    onEpochEnd: async(epoch, logs) => {
      console.log("Epoch:" + epoch + " Loss:" + logs.loss);
    }
  }
}).then(() => {
  console.log("Done");
});
In the above code, you should notice a lot of similarities with how you might train your model in Python. The fit()method in TensorFlow JS first takes in the input and output label data for your model. Next it takes in a JavaScript dictionary of configuration. You’ll go over these one-by-one
First, you define the number of epochs to train your model. In this case, you’ll use 500. Second, you pass in another JavaScript dictionary for the callbacks parameter. In Python, you may be used to passing in callbacks into an array argument. TensorFlow JS allows you to short-circuit some of that code, by passing in a named argument (in this case onEpochEnd), and a function to be called which returns the current epoch, and the loss data.
Note: I think it’s important to point out that in Python, the epoch progress and the loss is usually automatically printed. Without passing in a callback, TensorFlow JS will not output this information
The final thing worth pointing out is that fit() is an asynchronous function using JavaScript Promises to complete its task. Although going into Promises is out of scope for this tutorial. know that when fit() completes, you can attach yourself as a callback by calling then(). You also have the option to attach yourself to any errors that may be called by the promise through the catch() method.
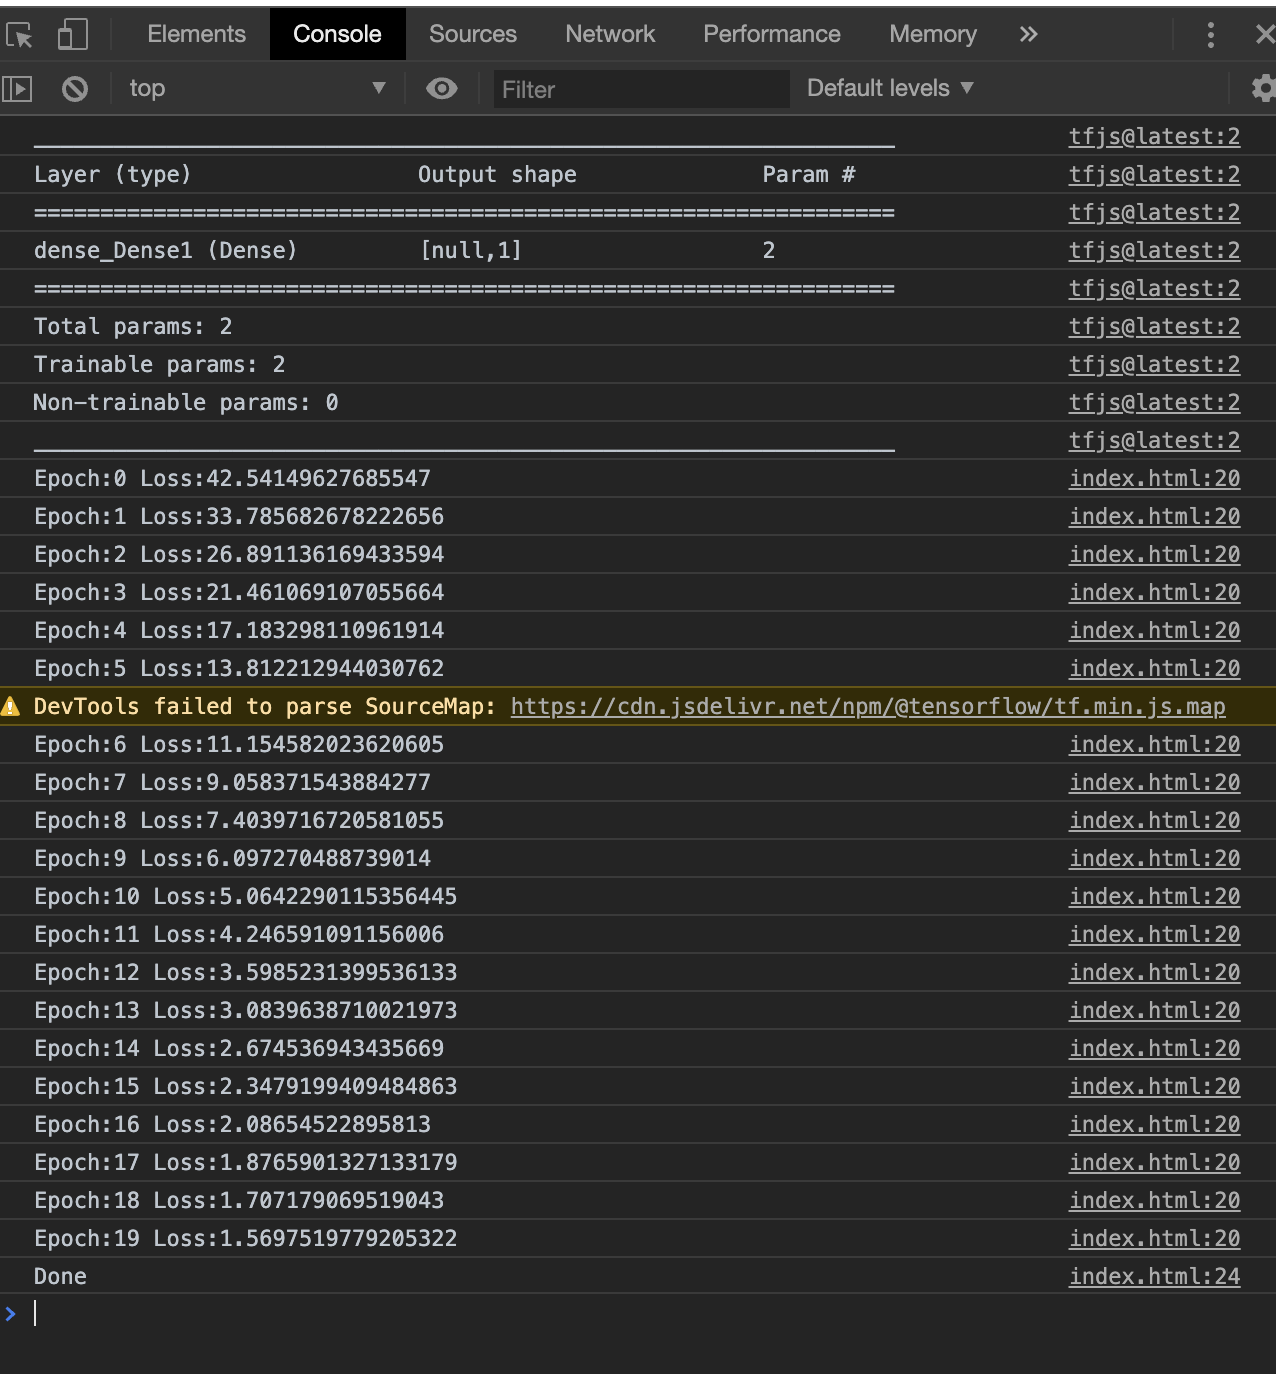
In any case, by the time the then() method is invoked, your model has been trained! Try refreshing your page, and you should see an output that resembles the following (I set my epoch to 20 just so you can see what the whole output may look like)
Finally, you can test a prediction using your newly trained model.
Testing your model
Once your model has been trained, you can pass a value into your model’s predict method and see how well it does.
In this case, you’ll pass in the value 10, which mean, you should expect a value of 19. Inside your then() callback, add the following code:
then(() => {
  const test = tf.tensor2d([10], [1,1]);
  const prediction = model.predict(test);
  prediction.print();
});
Refresh your page, and you should see something interesting
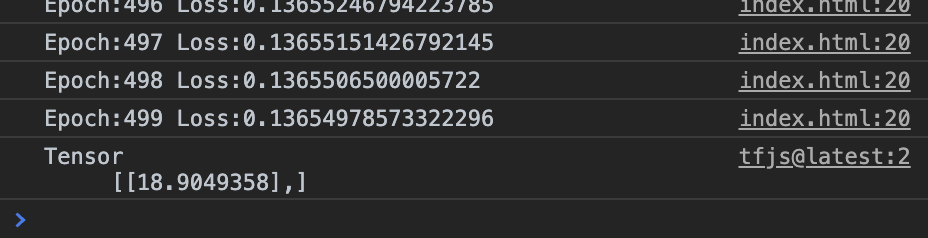
Notice that you don’t get an exact value of 19, but a value very close to 19. This partly due to the fact that you’re probably not giving your model enough training data or not enough epochs to get a better understanding of your model.
That’s it! You’ve successfully trained and tested a model using TensorFlow JS in your browser.
Takeaways
Hopefully you enjoyed this tutorial on working with TensorFlow JS.
If you’re coming from the Python world, a lot of this may look familiar. The key point is to pass close attention to the difference in syntax between the two languages when working with TensorFlow. I can’t tell you the number of times I forgot to pass in a dictionary into an argument, and ended up with some very weird behaviour.
If this is your first experience with TensorFlow, but have a background in JavaScript, you should marvel in the fact that you too can get into machine learning and benefit from the fact that your browser can leverage its access to your GPU for fast training.

The best book on machine learning for iOS.

Work with CoreML? Then you need MLFairy.com.

Enjoy my content? Consider becoming a member of my patreon, and help me continue making content!